26 February 2008
Enrolled in a Permaculture Design course
 Labels:
permaculture
Labels:
permaculture
Just a quick note to say that I've enrolled in a Permaculture Design course. I intend to use it to design a plan for our house, as well as my place of work. The course is doable online too. I am helping with the development of that, drawing content from the face to face course as it goes along. We already have a great group of online participants from all around.. it has a good feeling about it :)
24 February 2008
Harmony Farm visit
Labels:
dunedin,
permaculture
Here are some video's I captured from the Permaculture Design course field trip to Harmony Farm.
peta hudson - harmony farm and where to find information
Harmony Farm
Field trip to Harmony Farm - microclimates
Peta Hudson - Permaculture teacher
Participant intros - Permaculture Design Course
peta hudson - harmony farm and where to find information
Harmony Farm
Field trip to Harmony Farm - microclimates
Peta Hudson - Permaculture teacher
Participant intros - Permaculture Design Course
12 January 2008
Concrete steps
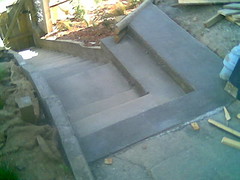 Our front steps have now been tidied up so that we have better access to the front yard. We still have to render the concrete now, but here's a little update and how we did it:
 We bought about 20 metres of 150x20 mil rough sawn pine for the step form. (150 is a perfect step height).
Because steps want to be at least 300 mil deep, and we needed a side wall, we also bought about 6metres of 250x20 board to make up the diagonal side walls.
If you look closely, you might be able to see that I notched out the diagonal to hold the step form. I prolly would do this again, as it made screeding difficult, and removing the form difficult. The little square boards you can see on the side wall and the batten brace were easily anough to hold the step form.

It was a last minute decision to pour yesterday. We hired a 6x4 trailer ($30), and lined it with plastic ($14) to pick up 0.6 cubic meters of ready mix ($130). It was a hot and windy day, so we have to be quick with it. Mike from next door brought over some buckets and we chain carried it into the form.
 We moved quickly with this, placing rocks to fill out some space and ensuring that the rocks were placed well away from the sides. We had the pour done in just over 30 minutes.
Estimating an hour for the mix to start hardedning in these conditions, we wasted no time leveling off the pour using straight timber to start and a trowl to smooth. About then Sarna and Chico arrived, surprised to see that we had already done the pour, but in time for the leveling.
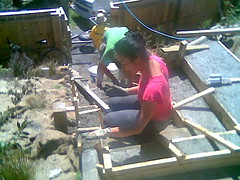 It was a little fiddley doing this actually, and it turned out that we didn't quite have enough (short by 1 bucket load). So we skimped on the side wall to make sure the steps were full.
About 30 minutes later we had the basic leveling done. Sunshine went and made sausages and drinks while everyone else finished the smoothing of. We didn't mess around with it too much towards to end, basically just getting it to the right level.
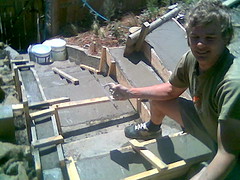 Then we let it go a bit hard (finger hard, another 1 hour) so I could use a scrubbing brush to take out any ridges and bumps. I finally finished the surface off with a paint brush, and rounded the edges a little with the trowel.
 Next morning I pulled off the form to reveal a mostly good result. The air pockets are not too serious and the rendering will finish it off nicely. The steps are all a good height and level and are strong. I need to research rendering a bit and will do that in the next week...
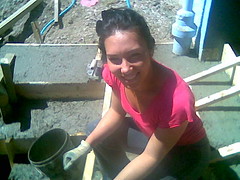 Pretty happy with our first attempt at concreting, and feel confident about the rest of the job around the back. Well have to get around 4 cubic meters pumped around the back ($800 + $280 for the pump :( Its very expensive, almost as much to cover the area in timber. 2nd hand pavers would be cheaper and use less in terms of non renwable material, but a lot more work... still thinking about it.
08 January 2008
new shoots, but new pests
Labels:
dunedin,
permaculture
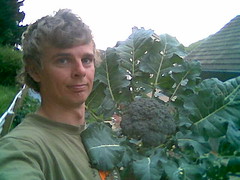 Took out the two broccoli today. They looked ready, but taste a little sour :( I wonder if their taste has anything to do with the soil they were in. They where in very clay soil, their leaves had been chopped by slugs, but a used no sprays... they certainly look healthy, but taste sour. Perhaps I picked them too soon or too late?
The cauliflower and brussel sprouts have a little bug all over them. The damage appears to be minimal, but I
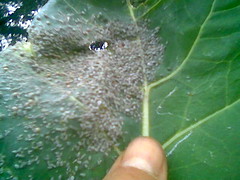 don't know what they are and so have no idea how to get rid of them.. I've done a brief search for cauli pests, but can't find anything that looks like what I have here... They could be mealybug but I'm not so sure. The mealybugs I know are more white than this grey colour, and are flatter and harder to see as bugs. These are easy to see as bugs.. note: the Internet needs a user generated image index where I can just scan images of pests categorized by their colour and size perhaps... or upload my own image for others to help identify...
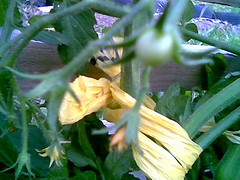
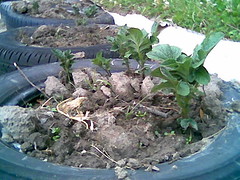
Finally, we have some fruit buds on the tomatoes, and new shoots on the potato tires :)
27 December 2007
A hole will be a slab will be a deck with an awning
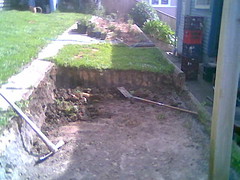
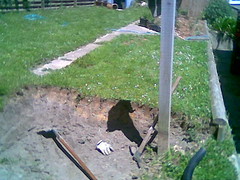 So, I've started digging out for the slab. The rain has come in and halted progress. The water has highlighted the levels I have and the drainage I'll need to put in. Am planning on digging a trench along the left side (viewers left) with fall towards the viewer and so water draining away from the house. Sunshine has saved enough to buy some timber for retaining the walls. The dirt I have bee taking away and depositing down the front in an effort to level off the new front yard. The rest of the dirt will be used to level the lawn section above the scrape. I'm wanting to build a couple of no dig garden boxes there, following the idea captured in this photo: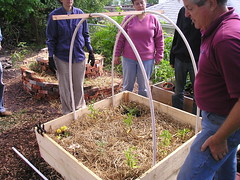
In the picture you can see pvc pipe being used as a frame for a plastic sheet to make a greenhouse. There is a timber spine for the pipe to pass through. I suppose this must add strength. It looks like an easy and cheap way to make a greenhouse. Not sure how to seal in the ends though...
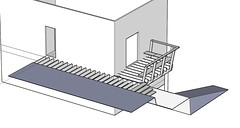
Below is the plan drawing for the deck less the awning at this stage. I like using Google Sketchup for these drawings. Its free and easy to use, building a 3D drawing.
This rain is a reminder of the need for an awning over at least some of the outdoor area we are trying to build.
Subscribe to:
Posts (Atom)